


For example, if you need to manage user logins to your WordPress site, Keycloak can be the ideal solution to centralize authentication (SSO) and secure user access.
And if installing Keycloak from scratch seems too complex, Clever Cloud provides a dedicated and fully managed add-on — our Keycloak as a Service. With just a few clicks, everything is deployed: your own Keycloak instance, without managing infrastructure or maintenance.
WordPress is just as simple to deploy on Clever Cloud. We even provide a detailed WordPress guide to help you set everything up.
So, if you want to manage WordPress logins through Keycloak to centralize your identity management, doing it on Clever Cloud will make your life much simpler.
Install and configure Keycloak with WordPress on Clever Cloud
Start by downloading the miniOrange OAuth Single Sign On plugin to your WordPress instance.
Next, create a Keycloak add-on on Clever Cloud. The documentation is available here: Keycloak installation on Clever Cloud.
Next, log in as admin to your Keycloak instance. You can find the link in the environment variable CC_KEYCLOAK_ADMIN_URL in the Clever Cloud console, under the configuration of your Keycloak service.
Also, the admin user credentials are in the environment variables CC_KEYCLOAK_ADMIN and CC_KEYCLOAK_ADMIN_DEFAULT_PASSWORD.
The default password is only valid for the first login. After that, Keycloak will require you to change it.
Once logged in to Keycloak, click on Manage Realms and then Create Realm.
In this example, I named it wordpressRealm, to keep it simple.
On WordPress, go to your list of plugins — you should see the miniOrange plugin.
Click the Configure button.
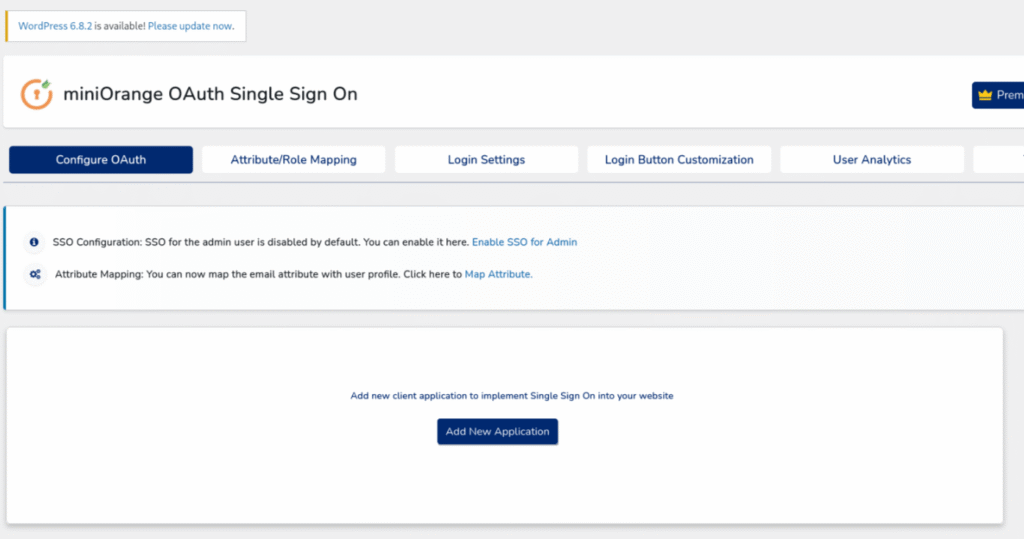
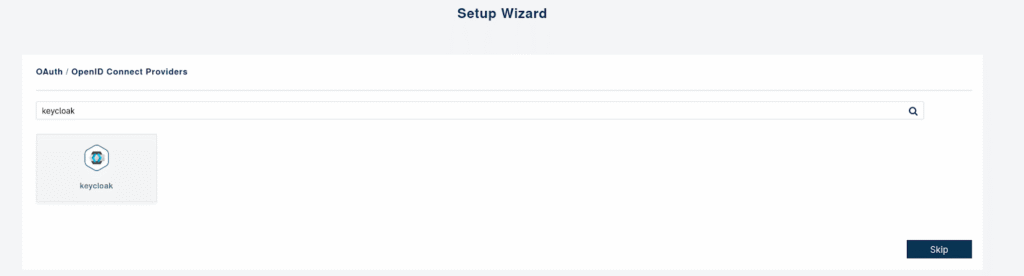
You’ll arrive on the plugin’s configuration page. Then, click Add application and select Keycloak.
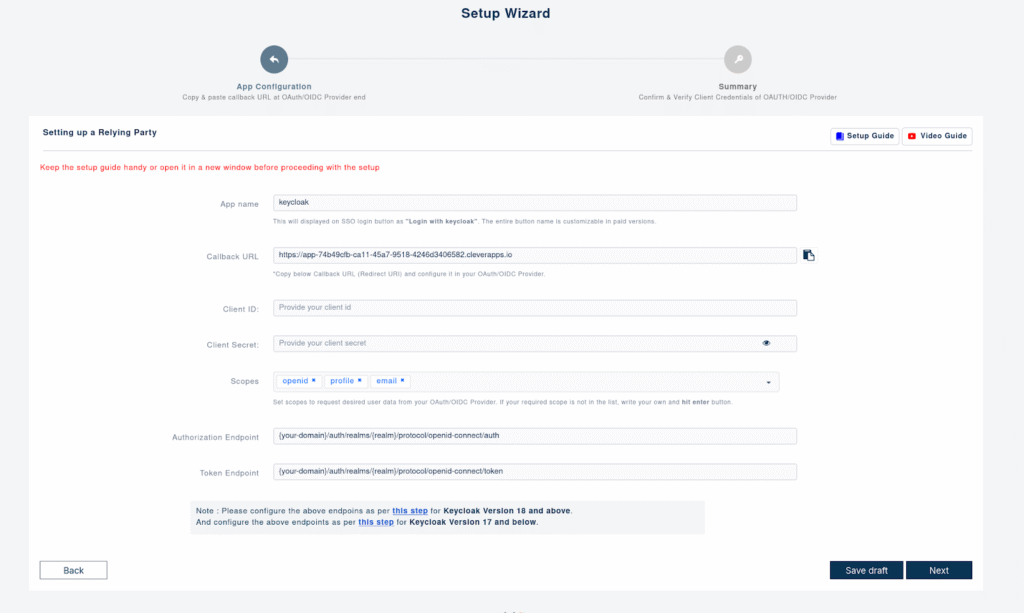
Once selected, you’ll reach the setup page to link your WordPress to Keycloak. Keep this page open, as we first need to configure Keycloak.
Configure Keycloak
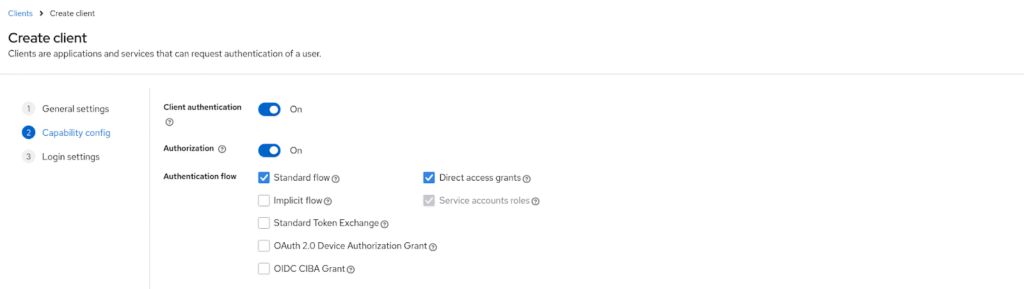
In Keycloak, open the Manage Realm menu and select the realm you just created. Once ready, click on Clients and then Create Client.
Fill in the ClientID field with a catchy name for your Keycloak client, then click next.
You will arrive at a page that allows you to define what your client can do. In our case, we need to enable Client authentication and Authorization, then check Standard flow and Direct access grants.
This gives the Keycloak client permission to manage user authentication and authorization.
Click Next again, and you’ll reach the final configuration step. You must add a Valid redirect URI — this is crucial and often the source of configuration errors.
To get it, go back to the MiniOrange setup page and copy the URL in the Callback URL field. Then confirm — the client is now created.
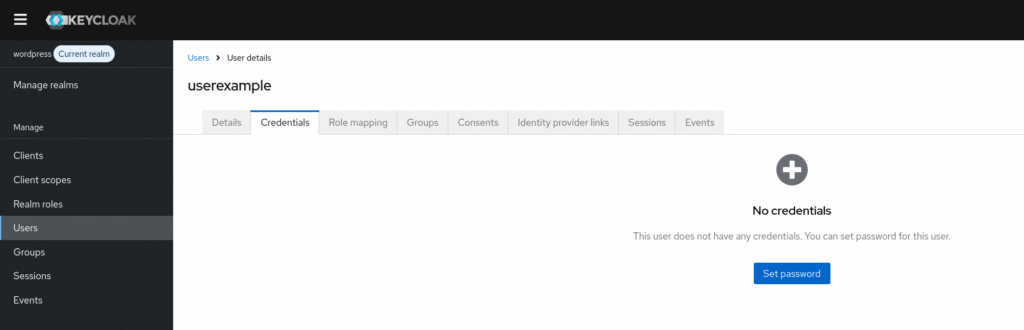
Add a test user
Next, you need to add a test user in Keycloak. You can do this from the Users menu and the Add-User button. Then, go to the Credentials menu of the user to assign them a password.
The Keycloak configuration is now complete, and we can return to MiniOrange.
Configure MiniOrange
Go back to the Clients menu and select the one you created. Go to credentials to obtain the famous key called “Client Secret”.
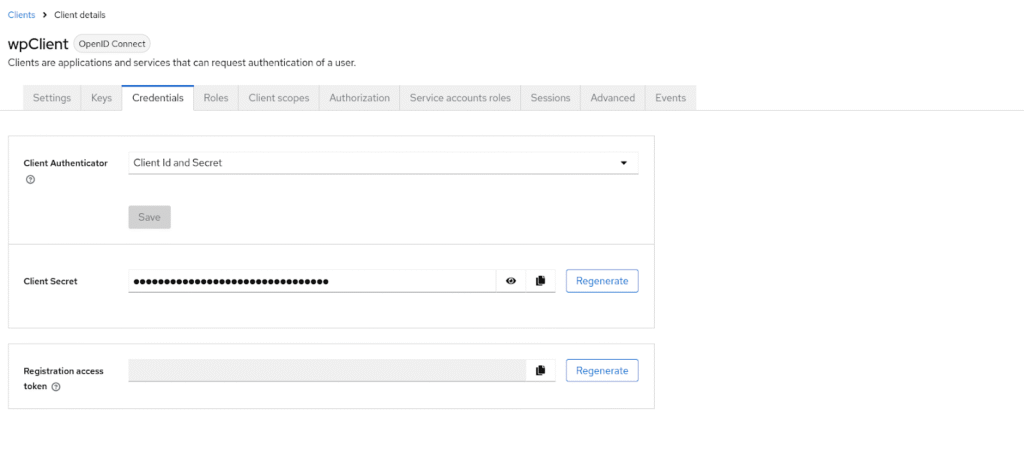
Copy the secret value and return to the setup page of the MiniOrange plugin. You can paste the secret into the corresponding Client Secret field. Also, enter the client ID you had chosen in the field of the same name.
For the Authorization Endpoint, you need to enter the URL:
http://keycloak.example.com/realms/{realm_name}/protocol/openid-connect/auth
For the Token Endpoint, you need to enter the URL:
http://keycloak.example.com/realms/{realm_name}/protocol/openid-connect/token
With Keycloak_domain being the domain of your Keycloak. It is in the format xxx-keycloak.services.clever-cloud.com, and you just have to copy it from the URL of your Keycloak. For realm_name, this is the name you gave to your realm.
When you have filled in all fields, click Next and Finish to complete the configuration. A login page will open asking you to log in with the Keycloak user you created.
If you log in successfully, it means everything is good and you can conclude the configuration by clicking on Finish.
Keycloak is now linked to your WordPress; only one last configuration remains to be done.
Enable admin login
By default, only normal users (i.e., non-administrators) can log in via Keycloak.
If you want admins to be able to log in as such via Keycloak, you need to return to the plugin configuration page, click on select an option, and then Edit Application.
Then check the option Allow admin user to perform SSO and save.
Next, go to the Attribute/Role Mapping menu and in the Email field, select the email attribute.
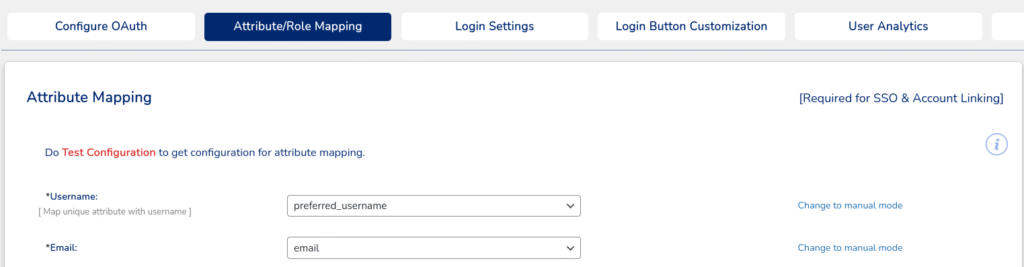
At this point, the email of the user on Keycloak will be correctly mapped to the email of the WordPress user. Thus, if you log in with a Keycloak user who has the same email as an administrator on WordPress, you will be logged into the administrator’s account.
You can then log out of WordPress, and you will see a Login with Keycloak button on the login screen.
Optional: configure sessions
By default, when you log in with Keycloak, a session is created that will keep your login active for a certain period.
If you log out and then try to log in again via Keycloak, if the session has not expired, you will be automatically logged into your account without having to enter a login or password.
If you wish to change this option, in your Keycloak, click on Realm settings and then Sessions.
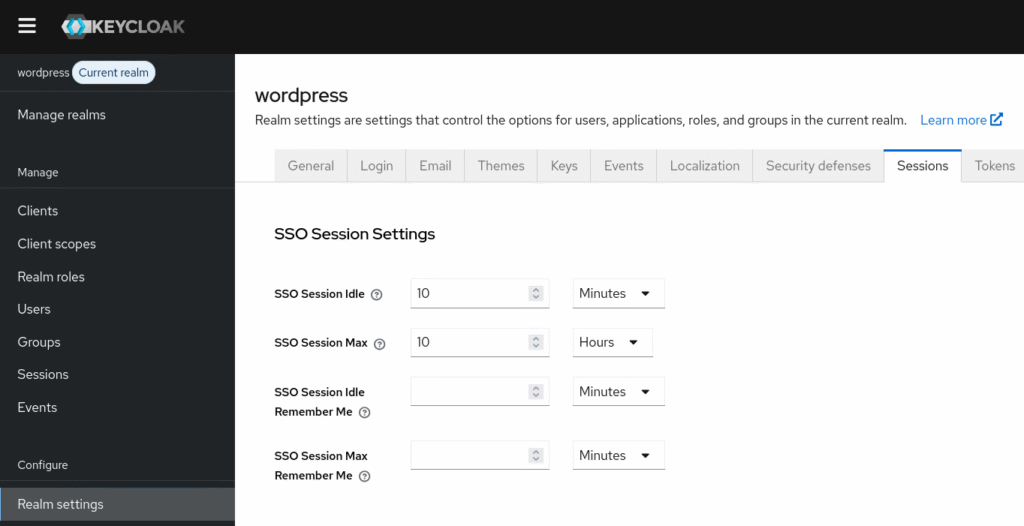
You will then be able to configure various session settings such as how long the session can be inactive before it expires, or the maximum lifetime of the session.
You’ve now linked your WordPress site with Keycloak through Clever Cloud, using a managed solution that eliminates infrastructure overhead. Thanks to this setup, you benefit from a secure, modern, and scalable SSO — without maintenance or complex configuration.